Thursday, April 26, 2012
Underskirt
Monday, April 23, 2012
Layer 4: Partlet

Little Things


Friday, April 20, 2012
Tuesday, April 17, 2012
Getting Started

The fabric is beautiful, the color very rich. But—as a taffeta—it is very slippery, all those yards sliding around as I tried to work on the seam. I used a cotton thread that was similar in color to the fabric, waxed by running the thread through my beeswax. That stuff smells so nice! I’m even using a brass needle that I found through a sutler in the UK who specializes in historic repros.
I have to be careful—two of my enfants terribles—my cats—are sniffing around the fabric. I just don’t trust them! They are still kittens and don’t take direction very well still.Saturday, April 14, 2012
Italian Renaissance Costuming Mini-Challenge, 'Over and Above'
In February, I participated in another Italian Renaissance Costuming Mini-Challenge, 'Over and Above'. For this challenge, I made Martin a Great Coat--great coat great cape great surcoat—honestly I never could find a real name that fit. The inspiration came from early 16th century Italian portraits, including:
Tiziano Vecellio, c1511-12: Portrait of a Man in a Red Hat
You will note that some have sleeves while others don’t. We decided due to the heat in our area to go sleeveless. I can add some later if desired.
The fabrics are cotton brocade and faux lynx, all hand sewn with cotton thread. While cotton was not used in northern Europe much, it was used in the Mediterranean area. The faux was a financial choice, but I was pretty pleased with this fur in look and feel. The fur is facing rather than lining (again the heat issue), but both methods were used in the past.


Tiziano Vecellio, c1511-12: Portrait of a Man in a Red Hat
I love this fabric. I originally chose it for the look and the light weight. I’ve cut the fabric into four pieces—two backs and two sides. I used a backstitch on all seams and a hem stitch along the long hem.
I cut the fur from the back. That way the fur can be fluffed nicely. I cut three pieces, the back of the collar and long strips for the front. I used back stitching to attach the fur to the fabric, turning it inside out to hide the seams. I attached the collar to the body with box pleats. Pretty pleased with myself.
I wish I had had time to iron it as I believe it will fall better, particularly in the back, but I wanted to get this to you today and the pictures were taken in the middle of last night when Martin got home from work. Of course, it will probably look better over a fitting outfit rather than his work shirt!


Thursday, April 12, 2012
IRCC II

This painting came from Kempeneer's period in Italy, in Ferrara. Kempenner was a Netherlandish painter, active mainly in Seville and known by the Spanish form of his name rather than the Flemish one, Pieter de Kempeneer. Before settling in Seville he had worked in Italy and he exercised a strong influence in Andalusia as a pioneer of Mannerism and the style of Raphael. Several of his paintings are in Seville Cathedral. In 1562 he left Spain to direct a tapestry factory at Brussels, his native city. (From the Web Gallery of Art).
Here's the plan:
Layer 1: camicia:
The camicia will be made out of white linen (stash), hand-stitched with cotton or linen thread, trimmed in linen or cotton lace, with a square neckline (the lace trimmed edge shows at the neckline of the dress) and gathered cuffs (very clearly shown at the cuff of the sleeves). I’ll make it a bit shorter than the dress for ease of movement. I am back and forth right now on how I will execute the trim...
Layer 2: petticoat: something fun out of my stash!
Layer 3: Dress:
The dress appears to have the sheen of silk, perhaps a taffeta. I have a gorgeous greenish teal shimmery taffeta in my stash. I think I have matching cotton thread, but I will have to check. The waistline is slightly higher than natural—de riguer for this date. The sleeves have a full puff at the top, fitting the lower arm with a pretty detail at the cuff. Hard to tell what pleating the skirt has, I’m not sure that it would be cartridge as it doesn’t seem to puff out immediately from the waist. I will probably use box or just a simple gathered pleat as the material isn’t too heavy. The trim on the dress looks like a narrow gold soutache braid, forming stripes on the sleeves and a simple geometric on the bodice.
Layer 4: partlet:
The partlet is very sheer, a simple one like a kerchief that seems to be tucked into the front of the dress, a little bit falling over the shoulders of the dress. The material would be a cotton, linen, or silk gauze with metallic gold thread stripes. Might be a challenge to find the material, but I will try for something close. The edges from the neck to the neckline look like they are trimmed with a gold gimp, which I do have in my stash.
Sunday, April 1, 2012
Lost
I was lost, but found again. I've actually been working on quite a few projects and just about to start a big one for the summer.
In October 2011, I participated in the The Realm of Venus' first Mini-Challenge: the 'Idle Hands' challenge. I made a 16th century style fan flag, inspired by extant fans (image from Hartwood Castle website).
I chose to creat a flag fan--ventuolo--made of perforated parchment and gilded wood. I first researched flag fans, fairly easy due to the many wonderful sites with information about the Venetian 16th century accessories. It seems that flag fans could be made of fabric, parchment, or woven of ribbons or plant fibers. I chose parchment as I loved the perforated extant example. I wanted to do a finer perforation as I have a tool for that already. I thought the breeze created might be better without larger holes in the flag, too.
I acquired real parchment made of sheepskin. The pieces were lovely golden and had a texture that was unique unlike what you would find with faux paper parchment. The parchment was also thicker than paper, although still quite easy to punch through.
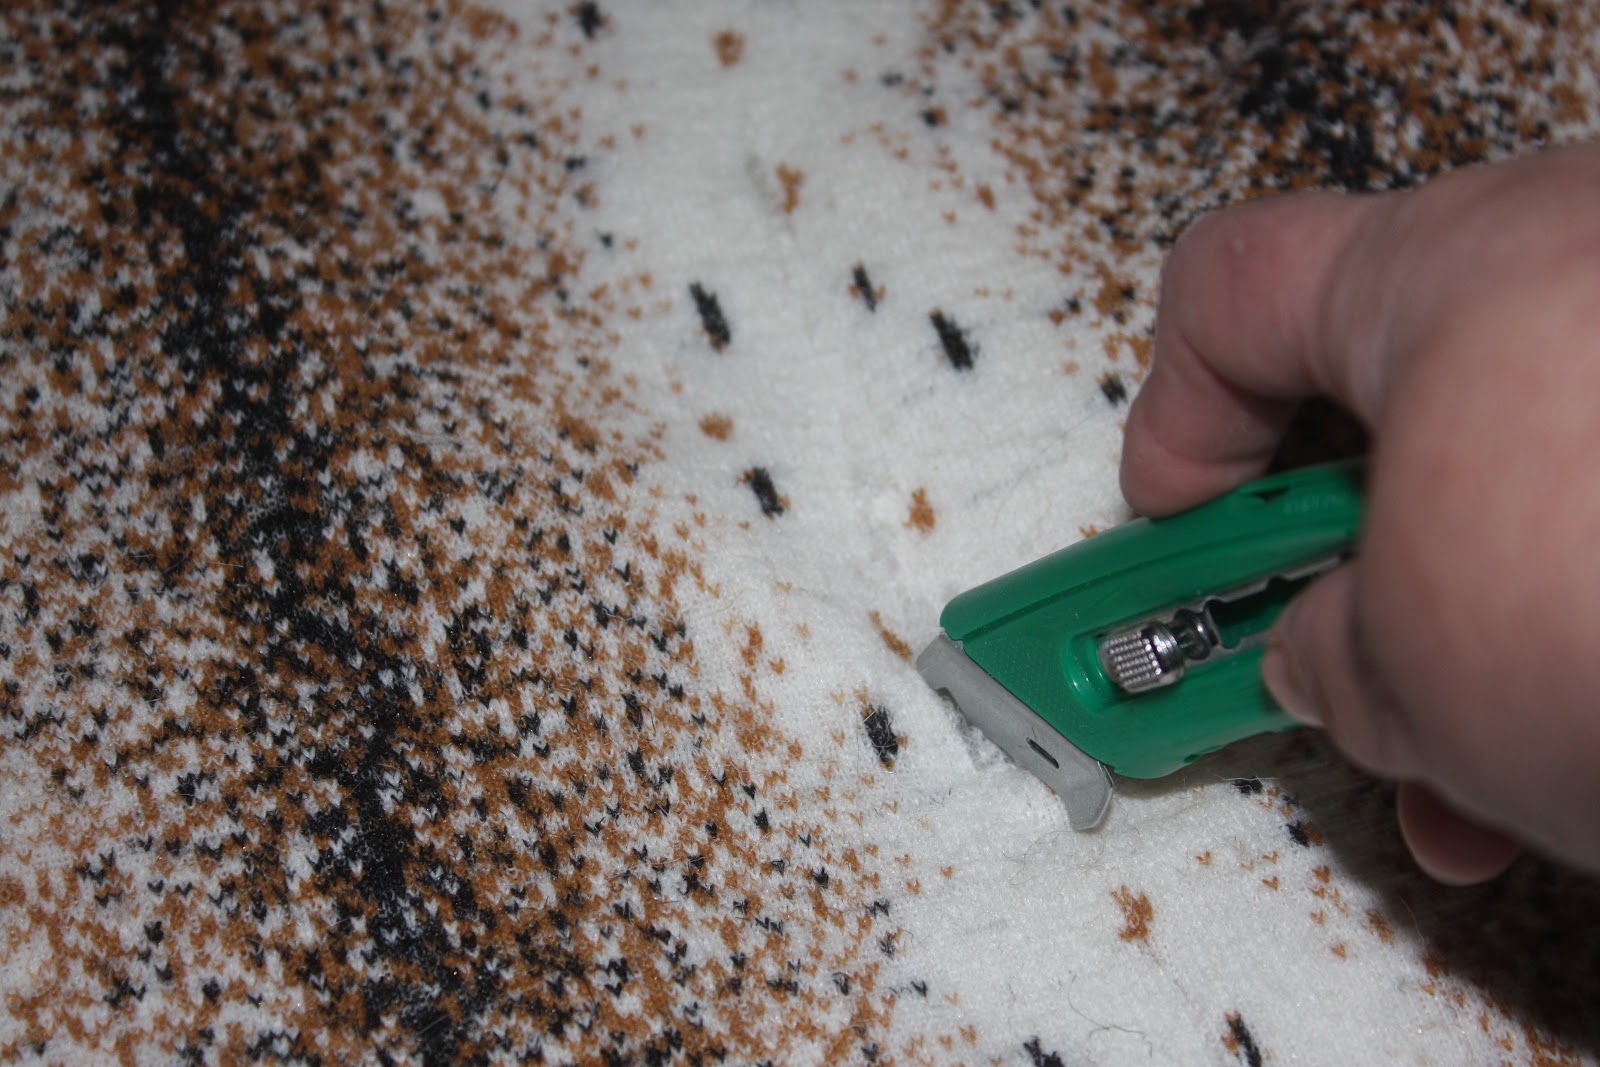
My perforation tool is very modern - as you can see in the picture - but fairly straight forward. Perhaps one day I will make one that might have been used in the 16th century. The design is created by pushing the pin through the parchment at regular intervals.
References
Realm of Venus http://realmofvenus.renaissanceitaly.net/
The Anéa Costumes http://www.aneafiles.webs.com/index.htm
Festive Attyre http://www.festiveattyre.com/
Oonaghs' Own http://webspace.webring.com/people/lo/oonaghsown/curves/fans_in_portraits.htm
Katerina’s Stuff http://katerina.purplefiles.net/FlorenceFiles/FLAccessoriesFAN.html
Lady Dianotto's Costume in Renaissance http://www.ladydianottos.com
In October 2011, I participated in the The Realm of Venus' first Mini-Challenge: the 'Idle Hands' challenge. I made a 16th century style fan flag, inspired by extant fans (image from Hartwood Castle website).
I chose to creat a flag fan--ventuolo--made of perforated parchment and gilded wood. I first researched flag fans, fairly easy due to the many wonderful sites with information about the Venetian 16th century accessories. It seems that flag fans could be made of fabric, parchment, or woven of ribbons or plant fibers. I chose parchment as I loved the perforated extant example. I wanted to do a finer perforation as I have a tool for that already. I thought the breeze created might be better without larger holes in the flag, too.


As you can see, the design is hard to photograph due to the small holes, but hopefully the lattice pattern comes out. The slightly blurry close-up, I took a picture without the flash so that backlight could (possibly) shine through some of the holes.
Here's the other side of the flag.
I used wooden molding for the handle, gluing the parchment edge in between two pieces. After sanding the wood, particularly where the pieces met and the ends, I used 18k gold paint to gild the handle. I used the same paint to decorate the parchment a little bit.
Perhaps not as fancy as some, definitely not as intricate as others, but it is my real parchment perforated flag fan!
Realm of Venus http://realmofvenus.renaissanceitaly.net/
The Anéa Costumes http://www.aneafiles.webs.com/index.htm
Festive Attyre http://www.festiveattyre.com/
Oonaghs' Own http://webspace.webring.com/people/lo/oonaghsown/curves/fans_in_portraits.htm
Katerina’s Stuff http://katerina.purplefiles.net/FlorenceFiles/FLAccessoriesFAN.html
Lady Dianotto's Costume in Renaissance http://www.ladydianottos.com
Subscribe to:
Posts (Atom)